Build an IoT dashboard with JavaScript and PubNub
Build an IoT dashboard with the PubNub JavaScript SDK: wildcard subscribe to device channels, online status with Presence, commands and firmware files.

Set up your environment
In this tutorial you run an IoT dashboard in the browser and look at how it's built with the PubNub JavaScript SDK. The devices are simulated: each one runs in a web worker in the same page, but it talks to the dashboard only over PubNub, the way a real device would. You see each device on a map with its latest reading and online status, and you can rename it, change how often it reports, reboot it and send it a firmware file.
You need:
Node.js with npm. The app uses a small Express server to serve the page.
A code editor, for example Visual Studio Code
A current browser: Chrome, Firefox, Safari or Edge
A Google Maps API key for the map. You create one in the build steps.
Get the code
Clone the repository and install the dependencies:
git clone https://github.com/PubNubDevelopers/iot-dashboard-javascript-demo.git
cd iot-dashboard-javascript-demo
npm install
Tested with the PubNub JavaScript SDK 13.1.2 and Node.js 22, at commit 1d93f1b of the repository (October 2026).
Create keys
You need a free PubNub account and a keyset with Presence and File Sharing on. Create it with your AI coding tool and the PubNub MCP Server, or by hand in the Admin Portal. Leave Access Manager off, as it is on a new keyset: the build steps explain why.
With the PubNub MCP Server
The PubNub MCP Server lets your AI tool create apps and keysets in your account. It runs at https://mcp.pubnub.com, and you sign in with your PubNub account, so there's nothing to install. If you're in an organization, its Account Owner or an Admin has to enable MCP connections first.
Create a free account if you don't have one, then add the server to your tool:
- Claude Code: run
claude mcp add --scope user --transport http pubnub https://mcp.pubnub.com, startclaude, enter/mcp, select pubnub and sign in. - Cursor: add
{"mcpServers": {"PubNub": {"url": "https://mcp.pubnub.com"}}}to.cursor/mcp.json, turn it on in Cursor Settings → Tools & MCP and sign in when prompted. - VS Code: add
{"servers": {"PubNub": {"type": "http", "url": "https://mcp.pubnub.com"}}}to.vscode/mcp.jsonand sign in when prompted. - Claude Desktop, Codex, Gemini CLI and OpenCode: see Set up the MCP server.
Then ask your tool: "Create a PubNub app with a testing keyset for an IoT dashboard tutorial. Turn on Presence for all channels and File Sharing, leave Access Manager off, then show me the publish and subscribe keys." Copy the Publish key and the Subscribe key it shows. You paste them into public/js/keys.js in the build steps.
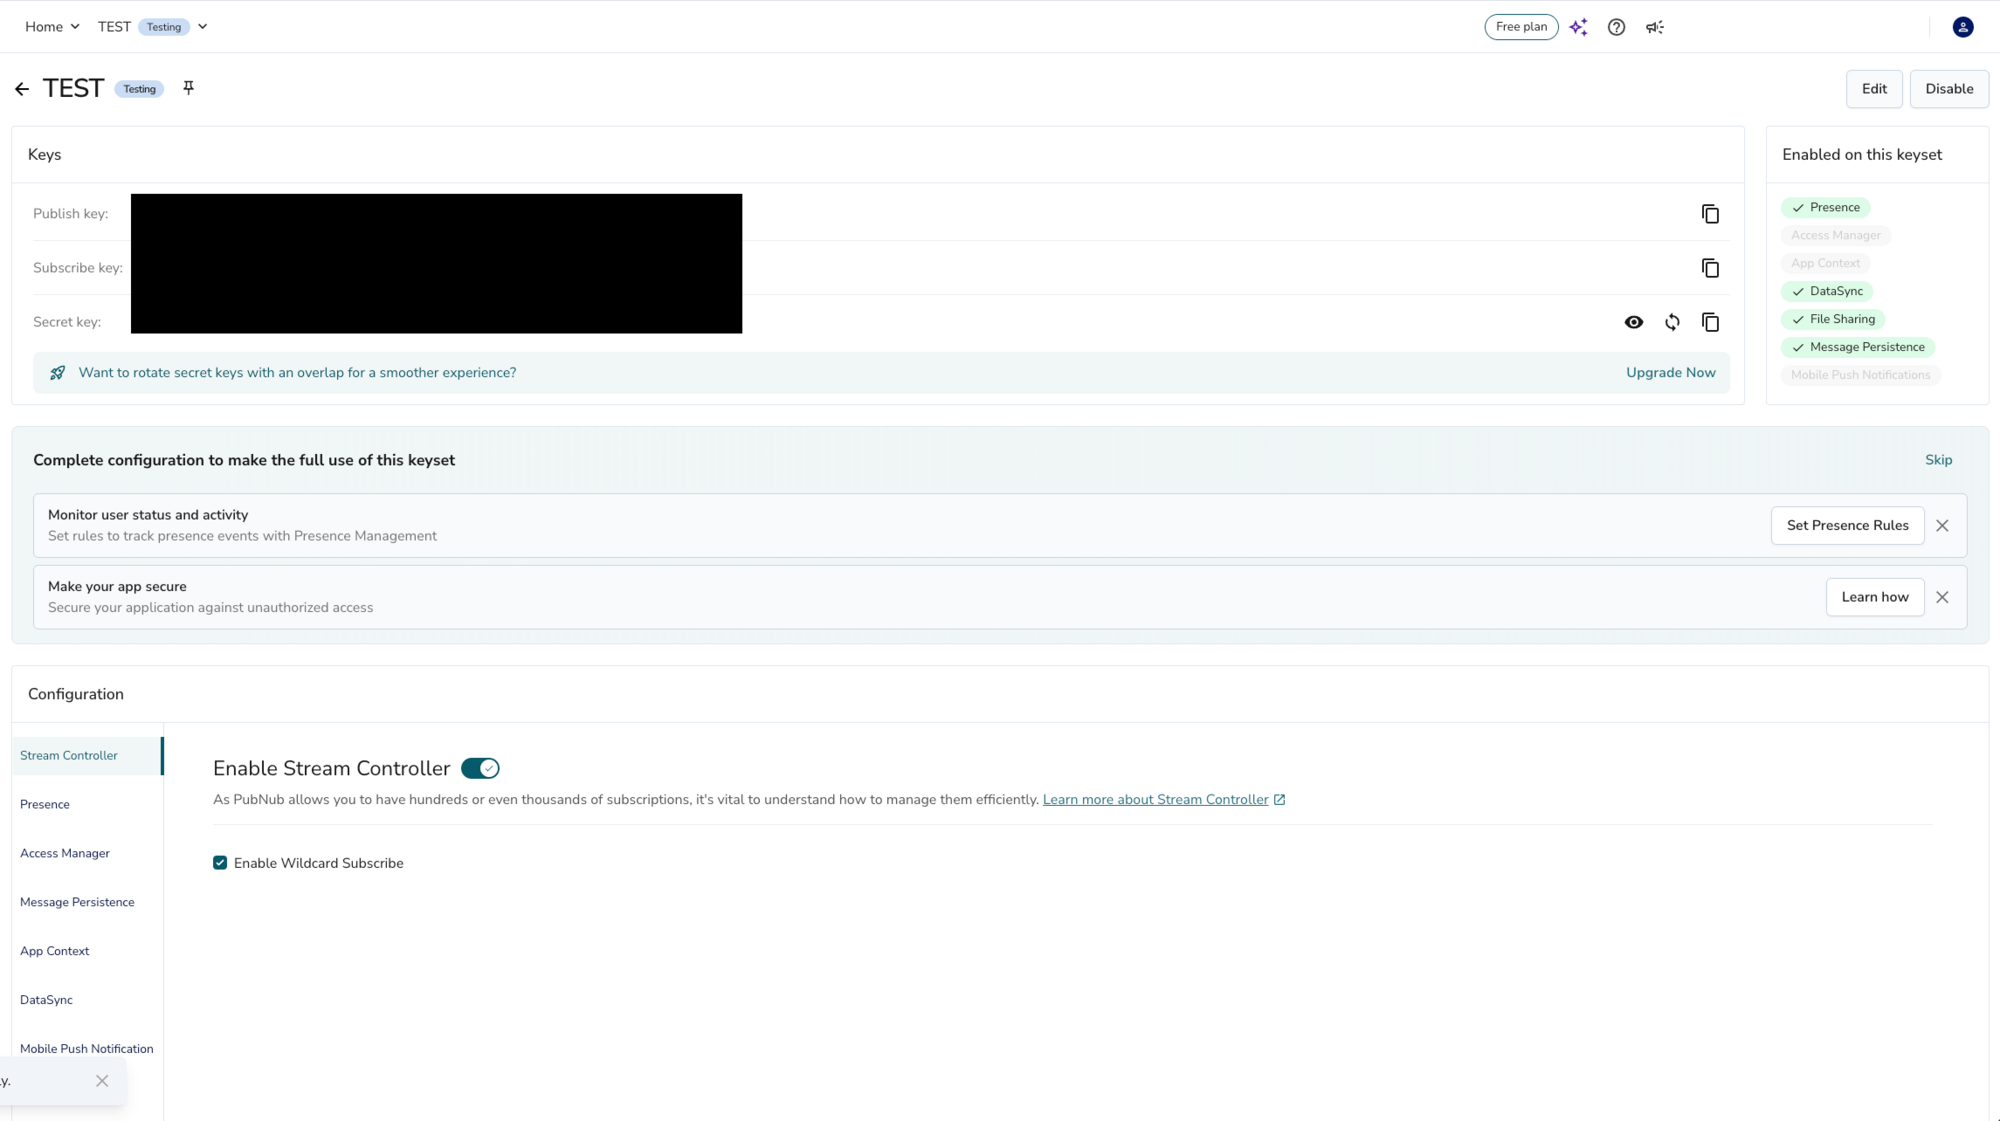
Before you build, open the keyset in the Admin Portal and check that Presence tracks All channels and that Stream Controller has Wildcard Subscribe on. The portal steps below explain why the dashboard needs them.
In the Admin Portal
Sign in to the Admin Portal, or create a free account. Go to Apps & Keysets and click Create app. Give the app a name.
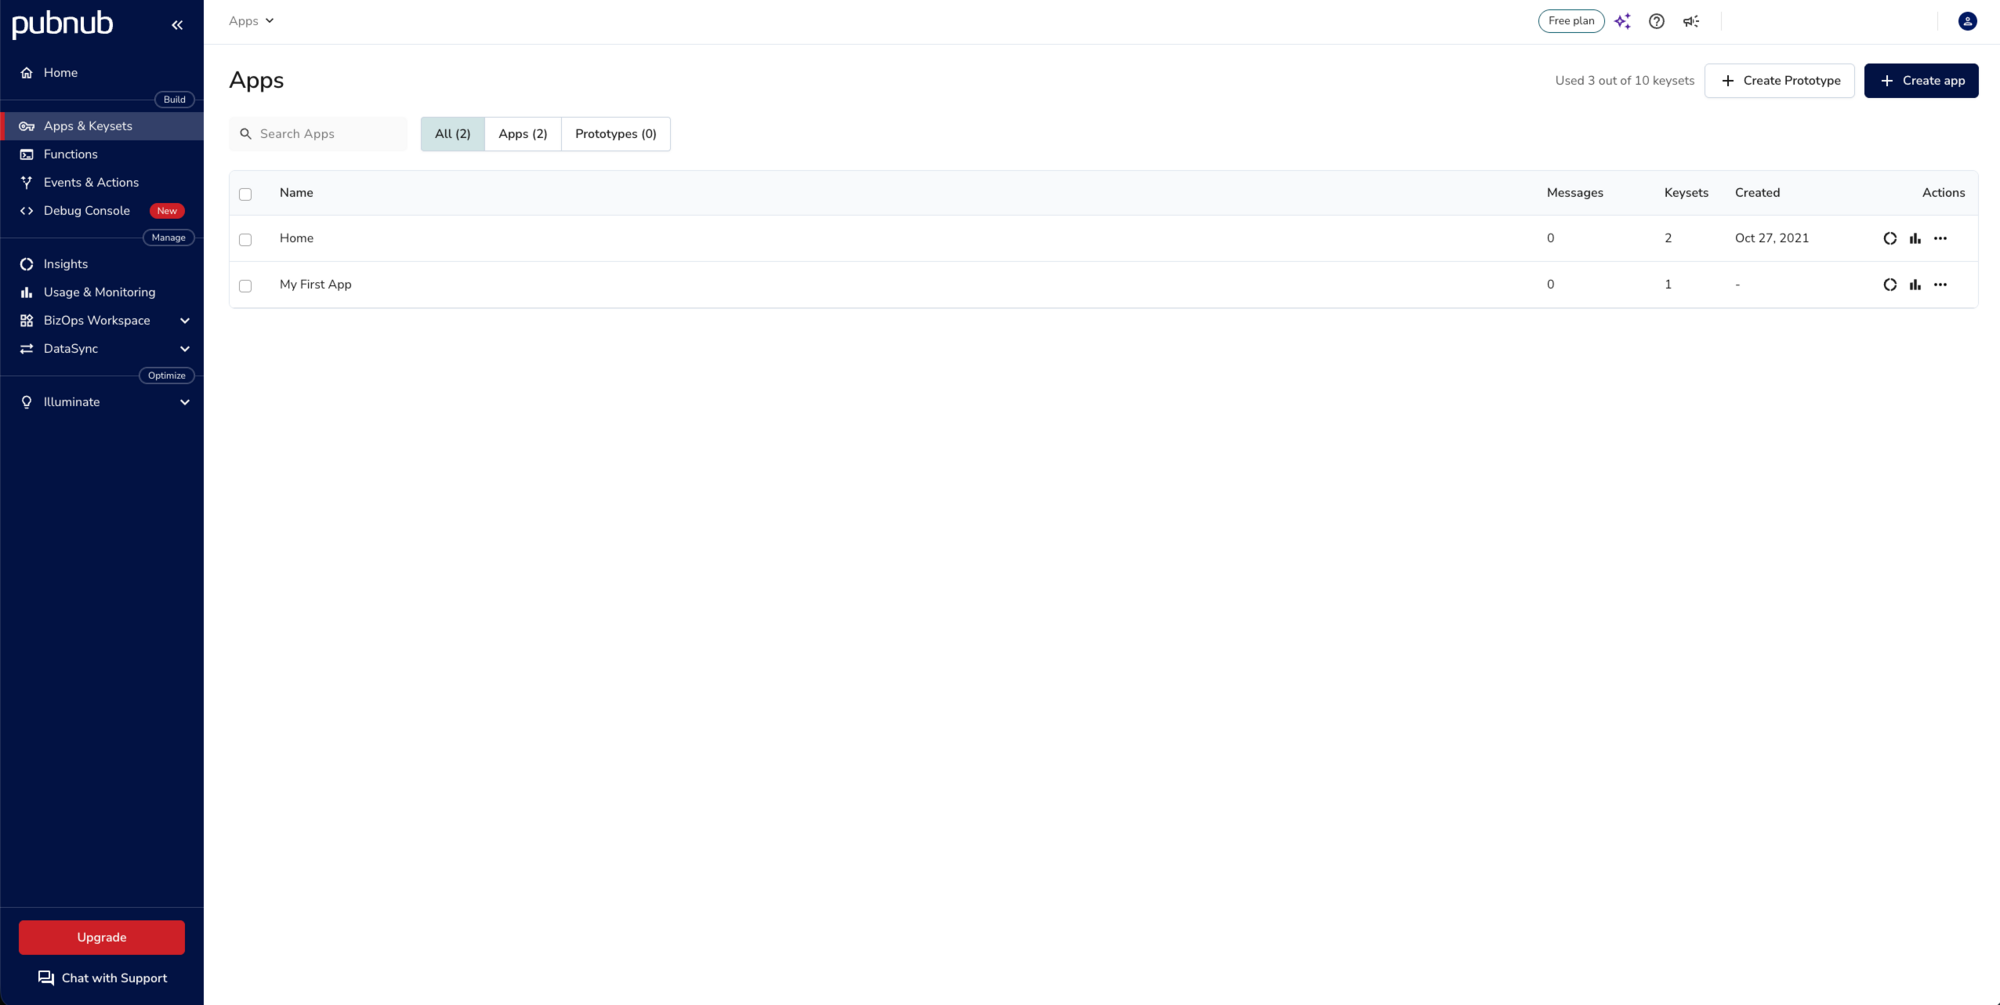
Open the app and click Create keyset.
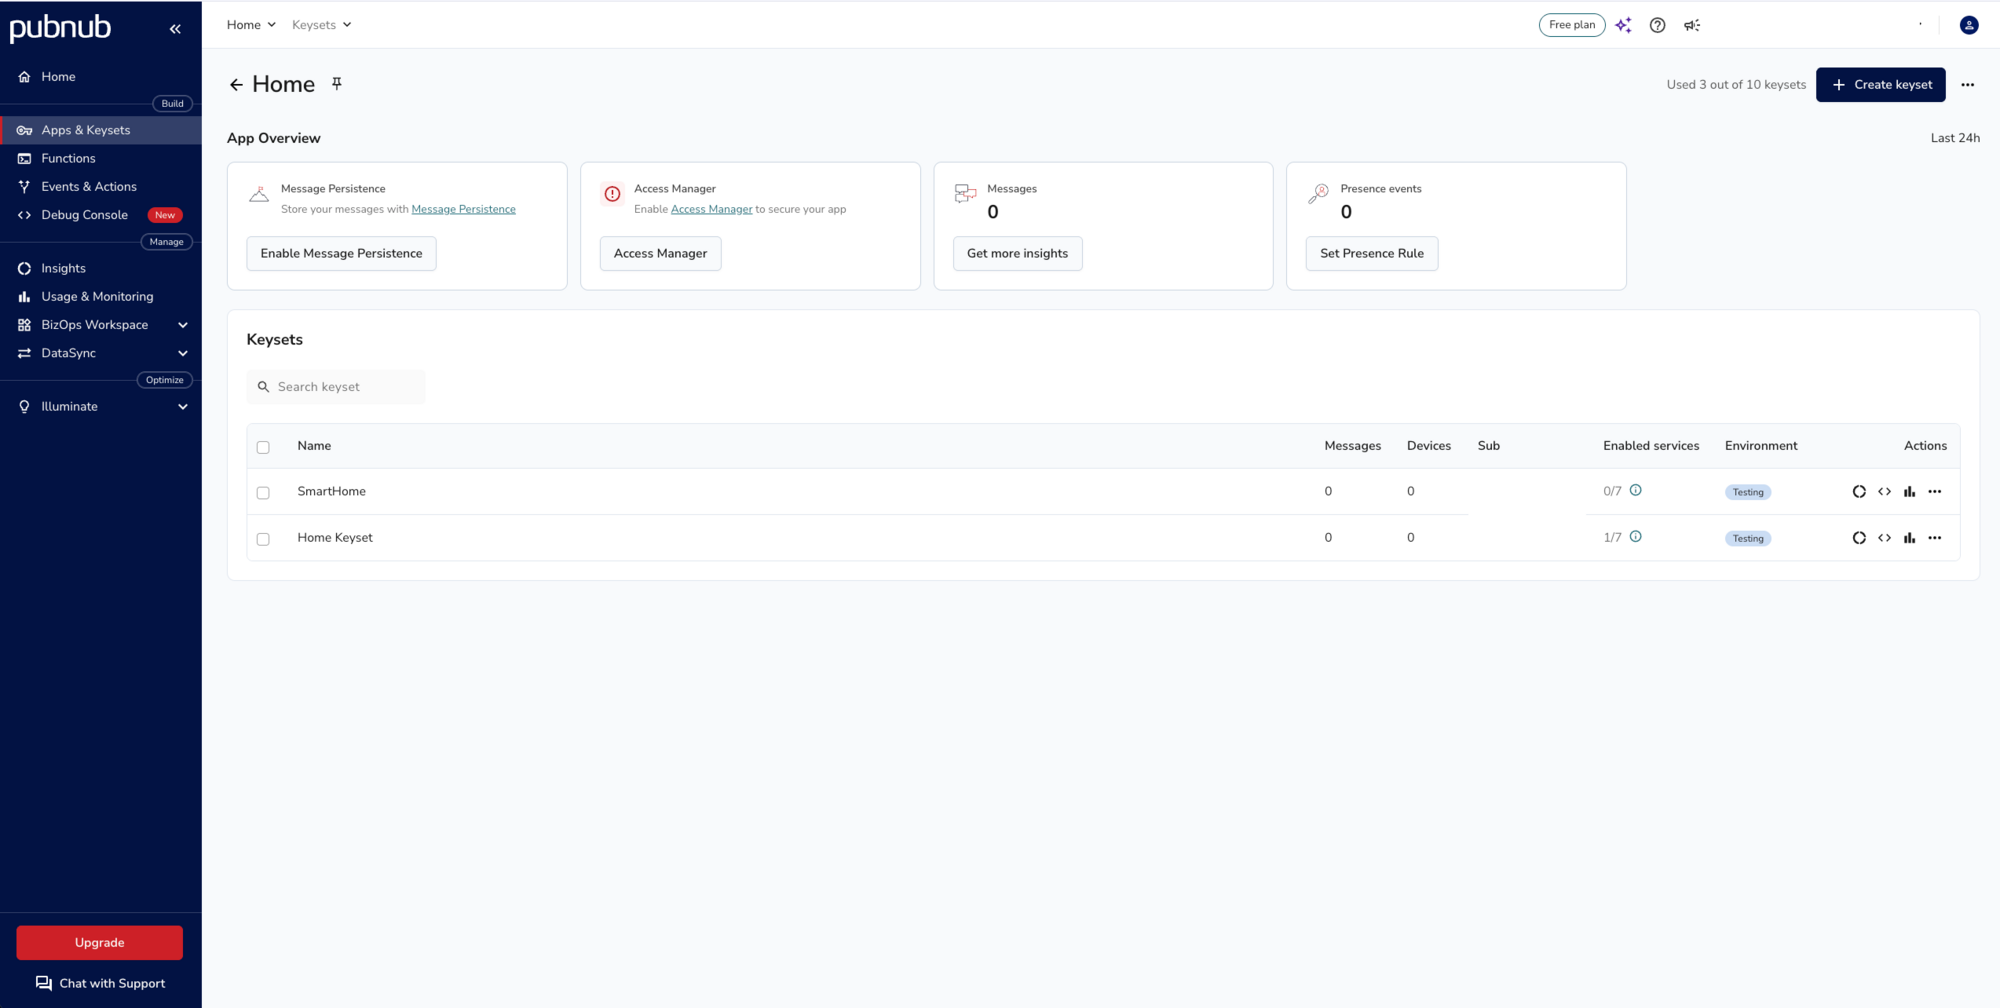
Enter a keyset name, keep the environment on Testing and click Next.
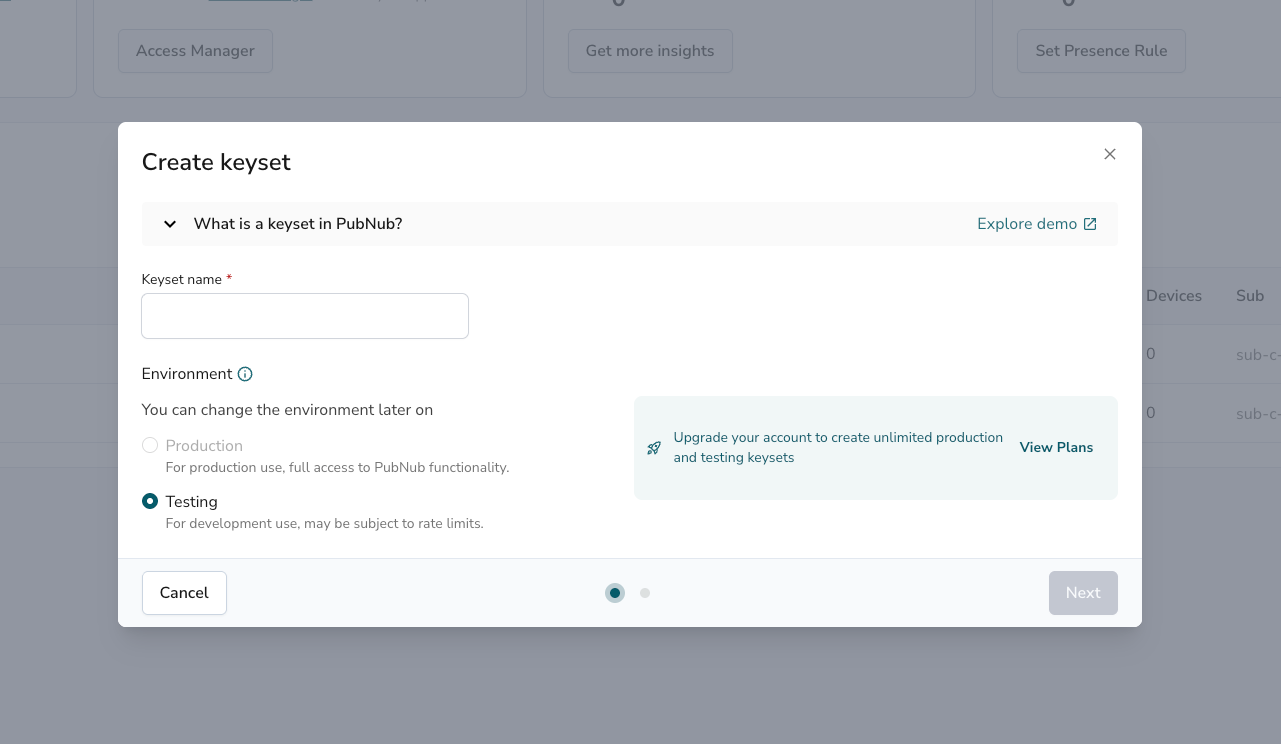
The next screen lists the services that come with the keyset. Presence and File Sharing are already on. Under Presence, choose All channels, then click Create.
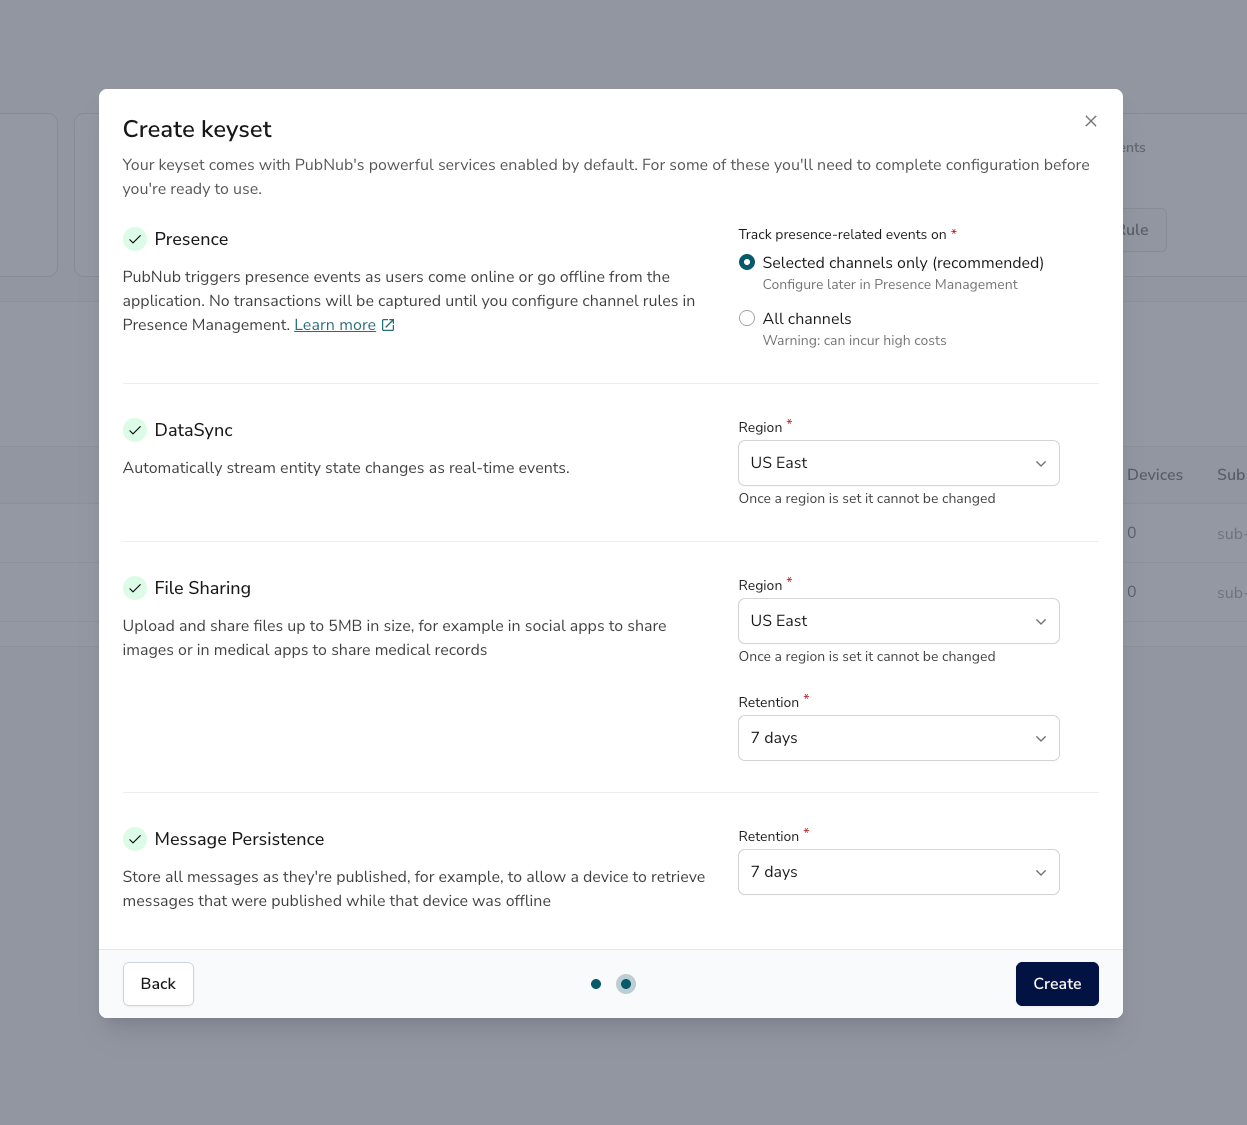
The default, Selected channels only, doesn't track presence until you add a rule in Presence Management. The sensor readings would still arrive, but every device would stay online in the dashboard, even after a reboot. All channels is fine for a test keyset with a few users; the portal warns it can incur high costs on a busy one. On a production keyset, keep Selected channels only and add a rule for the device.* channels with the join, leave and timeout events.
The dashboard also needs Stream Controller for its wildcard subscribe to device.*. It's on by default on new keysets; leave it on, with Wildcard Subscribe enabled in its settings.
Finally, copy the Publish key and the Subscribe key from the Keys panel. You paste them into public/js/keys.js in the build steps.
Build and run
The dashboard and the devices only talk over PubNub, on one channel per device:
- Each device has its own channel,
device.<device ID>, and uses its device ID as its PubNub User ID. It publishes its readings there every few seconds and listens there for commands. - The dashboard makes one wildcard subscription to
device.*, so it gets the messages and presence events of every device channel, including devices that don't exist yet. - To send a device a command, the dashboard publishes on that device's channel. To send it a file, it uses File Sharing on the same channel.
With this layout you add devices without changing the dashboard, and each device only receives what's meant for it.
The same code runs the hosted demo on pubnub.com, so a few lines only matter there. The steps below point them out.
Step 1. Add your PubNub keys
Open public/js/keys.js and paste your publish and subscribe keys from Create keys between the quotes:
const publish_key = '' //  ENTER YOUR PUBLISH KEY HERE
const subscribe_key = '' //  ENTER YOUR SUBSCRIBE KEY HERE
The dashboard passes the same keys to each simulated device. A real device would get its keys, and its device ID, when you provision it.
Step 2. Add a Google Maps API key
The map uses the Google Maps JavaScript API. The key in keys.js doesn't work outside the hosted demo, so the map shows "Sorry! Something went wrong" until you add your own:
Follow Google's Set up the Maps JavaScript API to create a project and an API key. Google requires a billing account for the project; the pricing page lists the free monthly usage.
Enable the Maps JavaScript API for the project.
Restrict the key to websites, with
http://localhost:8001/*as the allowed referrer, so nobody else can use it.In
public/js/keys.js, replace the value ofGOOGLE_MAP_KEYwith your key.
Don't commit your keys if you push your copy of the repository anywhere.
Step 3. Run the dashboard
Start the server and open http://localhost:8001:
npm start
The page needs this server rather than file://, because the simulated devices run as web workers. After a few seconds you see six devices on the map and in Registered Devices, each with a green dot for online. Four of them move along a route. Click a device to see its latest reading, and the pencil icon to edit it.
The devices only live in this page: reload it and you get six new ones.
Step 4. Create the dashboard's PubNub client
createPubNubObject() in public/js/pubnub_setup.js creates the client. The dashboard picks a random User ID and keeps it in session storage while the tab is open:
var pubnub = new PubNub({
  publishKey: publish_key,
  subscribeKey: subscribe_key,
  userId: UUID
})
Next, the function asks a token server for an Access Manager token, and then sets a subscribe filter:
//  IN PRODUCTION: Replace with your own logic to request an Access Manager token
var accessManagerToken = await requestAccessManagerToken(UUID)
if (accessManagerToken == null) {
  console.log('Error retrieving access manager token')
} else {
  pubnub.setToken(accessManagerToken)
  //  The server that provides the token for this app is configured to grant a time to live (TTL)
  //  of 360 minutes (i.e. 6 hours).  IN PRODUCTION, for security reasons, you should set a value
  //  between 10 and 60 minutes and refresh the token before it expires.
  //  For simplicity, this app does not refresh the token
}
pubnub.setFilterExpression("uuid != '" + pubnub.getUserId() + "'")
return pubnub
The token is for the hosted demo. Its keyset has Access Manager on, and PubNub's demo token server (requestAccessManagerToken(), at the end of the file) grants each client access to the device channels. It sends the server your client's User ID. Your keyset has Access Manager off, so PubNub ignores the token and the demo works with or without it. If you turn Access Manager on, replace requestAccessManagerToken() with a call to your own server (see Before you go to production at the end of this tutorial).
The subscribe filter is meant to stop the dashboard's own commands from coming back to it: it publishes commands on the same channels it subscribes to. A filter can't test the publisher's User ID, though, so this one doesn't remove anything. The dashboard ignores its own commands anyway, because their publisher isn't a known device (step 5). To filter them on PubNub's side, publish commands with meta (for example meta: { sender: 'dashboard' }) and filter on that (meta.sender != 'dashboard').
Step 5. Subscribe to every device at once
onload() in public/js/pubnub_handler.js adds a listener and makes the wildcard subscription when the page loads. With withPresence: true it also gets the presence events of every device channel. Wildcard subscribe needs Stream Controller with Wildcard Subscribe on (see Create keys).
//  Wildcard subscribe, to listen for all devices in a scalable manner
pubnub.subscribe({
  channels: ["device.*"],
  withPresence: true
})
Newer code can do the same with a subscription object, pubnub.channel('device.*').subscription({ receivePresenceEvents: true }), which keeps its own listeners (Subscribe). The repository uses the client-level subscribe() and addListener(), which still work in SDK 13.
When the subscription is up, the listener gets a status event and starts the simulated devices, so the dashboard doesn't miss their first readings. After a dropped connection, the SDK restores the subscription and can report it as connected again, so the code starts the simulators only once:
status: async statusEvent => {
  //  Channel subscription is now complete, pre-populate with simulators.
  //  The SDK reports 'connected' again after it restores the subscription following a network drop,
  //  so only create the simulators once.
  //console.log(statusEvent)
  if (!simulatorsInitialized && statusEvent.affectedChannels[0] === 'device.*') {
    simulatorsInitialized = true
    initializeSimulators()
  }
},
Each reading updates the stored device, its marker on the map and the tables. The handler skips messages from publishers it doesn't know, which includes the dashboard's own commands. It starts like this:
var nameChanged =
  iotDevices[payload.publisher].name != payload.message.friendly_name
iotDevices[payload.publisher].name = payload.message.friendly_name
iotDevices[payload.publisher].lat = payload.message.lat
iotDevices[payload.publisher].long = payload.message.long
Step 6. Show which devices are online
A device counts as online while it's subscribed to its own channel. When it subscribes, PubNub sends a join presence event on that channel; when it unsubscribes, a leave; and when it stops sending heartbeats, for example because it lost its connection, a timeout. The dashboard turns a join into a green dot and any other event into a grey one:
presence: presenceEvent => {
  //  Will be invoked regardless of the 'Announce Max' setting on the key
  if (iotDevices[presenceEvent.uuid]) {
    if (presenceEvent.action === 'join')
      iotDevices[presenceEvent.uuid].online = 'yes'
    else iotDevices[presenceEvent.uuid].online = 'no'
    updateRegisteredDevice(presenceEvent.uuid)
  }
}
A device that loses its connection doesn't send a leave, so it stays green until its presence timeout runs out: 300 seconds by default. Set a shorter presenceTimeout on the device's client if you need to notice sooner; it then sends heartbeats more often, and each one is a request.
When a channel reaches the Announce Max setting (20 users by default), PubNub sends interval events instead of one event each. They have no single uuid, so this handler skips them. With one device per channel that doesn't happen here; a channel with many listeners would need to handle them.
Step 7. Look at a simulated device
Each device runs public/js/simulation/worker_devicesim.js in a web worker, with its own PubNub client. Its device ID is its User ID, which is how the presence events tell the dashboard which device joined or left:
localPubNub = new PubNub({
  publishKey: pubKey,
  subscribeKey: subKey,
  userId: id,
  listenToBrowserNetworkEvents: false //  Allows us to call the PubNub SDK from a web worker
})
A web worker has no window to watch for online and offline events, hence listenToBrowserNetworkEvents: false. The device then gets a token the same way as the dashboard (step 4).
The device publishes a reading on its channel at its reporting interval (5 seconds to start with):
await localPubNub.publish({
  channel: channelName,
  message: {
    lat: localLatitude,
    long: localLongitude,
    friendly_name: deviceName,
    sensors: [
      {
        sensor_name: sensorName,
        sensor_type: sensorType,
        sensor_update_frequency: interval,
        sensor_value: sensorValue,
        sensor_units: sensorUnits
      }
    ],
    firmware_version: firmwareVersion
  }
})
A position goes out of date quickly, so a real fleet could send it as a signal instead: signals are meant for values where only the latest one matters. They're limited to 64 bytes, never stored and can't trigger mobile push notifications. This demo publishes the whole reading as one message.
Step 8. Send commands and firmware to a device
The device subscribes to its own channel and reacts to commands and files from the dashboard. It gets its own readings back too, and skips them:
  message: async payload => {
    if (payload.publisher !== id) {
      if (payload.message.action === 'reboot') {
        deviceSimulator.reboot()
      } else if (payload.message.action === 'stop') {
        deviceSimulator.stop()
      } else if (payload.message.action === 'update') {
        deviceSimulator.setName(payload.message.params.deviceName)
        deviceSimulator.changeIntervalValue(
          payload.message.params.sensorUpdateFrequency
        )
      }
    }
  },
  file: async payload => {
    if (payload.publisher !== id) {
      //  Only file we handle is firmware
      deviceSimulator.updateFirmware(payload.file.name)
    }
  }
})

await localPubNub.subscribe({
  channels: [deviceChannelName],
  withPresence: false
})
In the Edit Device window, Save changes publishes an update command with the new name and reporting interval, and Reboot Device publishes reboot, both on the device's channel (public/js/device_edit.js):
async function rebootDevice (deviceId) {
  await pubnub.publish({
    channel: iotDevices[deviceId].channelName,
    message: {
      action: 'reboot'
    }
  })

  //  DEMO: used by the interactive demo
  actionCompleted({
    action: 'Reboot any device (it will go offline briefly)',
    debug: false
  })
  //  END DEMO: used by the interactive demo

  $('#editModal').modal('hide')
}
The actionCompleted() calls between the DEMO comments tick off the tasks on the pubnub.com demo page. They come from demo-interface.js, which index.html loads, and do nothing when you run the page yourself.
A reboot unsubscribes the device, so the dashboard gets a leave event and shows it offline. Five seconds later it subscribes again, and the join event turns the dot green:
async reboot () {
  this.stop()
  await localPubNub.unsubscribe({ channels: [deviceChannelName] })
  setTimeout(this.postReboot, 5000, this)
}

async postReboot (deviceSimulator) {
  await localPubNub.subscribe({
    channels: [deviceChannelName],
    withPresence: false
  })
  deviceSimulator.start()
}
Update Firmware (& Reboot) sends the file you choose on the device's channel with File Sharing. The device gets it in its file listener, takes the file name as its new firmware version and reboots. The firmware folder of the repository has example files; any file up to 5 MB works.
await pubnub.sendFile({
  channel: iotDevices[deviceId].channelName,
  file: firmwareFile
})
Step 9. Draw the map
public/js/map.js draws the Google map and moves one marker per device. There's nothing PubNub-specific in it: the message handler from step 5 calls moveMapMarker() with each new position.
map = new google.maps.Map(document.getElementById('map-canvas'), {
  zoom: 2,
  minZoom: 2,
  center: myLatlng,
  streetViewControl: false
})
Step 10. Try it out
Click a device in Registered Devices or on the map to see its reading, update interval, last seen time and firmware.
Click the pencil icon, change the name and set the interval to 2 seconds, then Save changes. The new name shows in the list with the next reading.
Click Reboot Device: the dot goes grey, and green again about 5 seconds later.
Choose a file from the
firmwarefolder and click Update Firmware (& Reboot): the device reboots and reports the file name as its firmware.Click Create New Device, pick a sensor and a route (or a fixed location) and save. The new device shows up on the map.
Select a device and click Delete Device.
The map says "Sorry! Something went wrong"? Google rejected the map key. The browser console names the error; check that GOOGLE_MAP_KEY holds your key, the Maps JavaScript API is enabled and the key allows http://localhost:8001/* (step 2). The devices still work without the map.
The devices never go grey after a reboot? Presence isn't tracking the device.* channels. In the Admin Portal, set Presence to All channels on your keyset, or add a Presence rule for them (see Create keys).
No devices at all? Check that Stream Controller with Wildcard Subscribe is on for your keyset, the keys in public/js/keys.js, that the page is on http://localhost:8001 and not a file, and the browser console for errors.

Congratulations - what's next?
You have an IoT dashboard on the PubNub JavaScript SDK: one channel per device, a wildcard subscription to all of them, online status from Presence, commands as messages and firmware files with File Sharing.
To take it further:
Keep devices on the server. The devices only live in the page. To share them between dashboards, store each device's details with DataSync (it needs Access Manager) or in your own database.
React to readings on PubNub. A Function can check every reading as it's published, for example to alert someone when a freezer gets too warm.
Connect real devices. A device needs the same three things as the simulator: its own channel, a User ID and your keys. Use a PubNub SDK for your device's platform.
Go further with the JavaScript SDK
JavaScript SDK documentation Presence File Sharing IoT dashboard demoBefore you go to production
Control who can publish. With Access Manager off, anyone with your keys can publish on any device channel, including commands. Turn on Access Manager, and have your own server give each device a token for its own channel only and the dashboard a token for
device.*. That server replacesrequestAccessManagerToken()and the demo token server.Treat readings as untrusted. The dashboard writes device names and readings into the page with
innerHTML. Set them withtextContentinstead, and check that each reading has the fields and types you expect before you use it.Filter the dashboard's own commands with
meta, as described in the build steps, if you don't want them delivered back.
Ready to get beyond proof of concept?
Schedule a 15-minute chat with one of our experts to get your project moving.
Talk to an ExpertTake it to production on your own keys
Create a free PubNub account to get permanent keys for this app.